How to deploy a blog using the code in this repository?
02 Nov 2025Author: Shenyao Jin, RCP@CSM, November 2, 2025
I’ll try to explain how to deploy a blog using the code in this repository using plain language. :P
Prerequisites
Before you begin, ensure you have met the following requirements:
- A GitHub account
- Basic knowledge of Git and GitHub
- Familiarity with Markdown
- A web browser
- A text editor (
VSCodeis recommended if you want to deploy locally)
Steps to Deploy the Blog
- Fork the Repository:
- Go to the repository page and click on the “Fork” button in the top right corner. Like this:
 I’m the owner of this repository, so you will see I can not fork it. But you will see the “Fork” button.
- Go to the repository page and click on the “Fork” button in the top right corner. Like this:
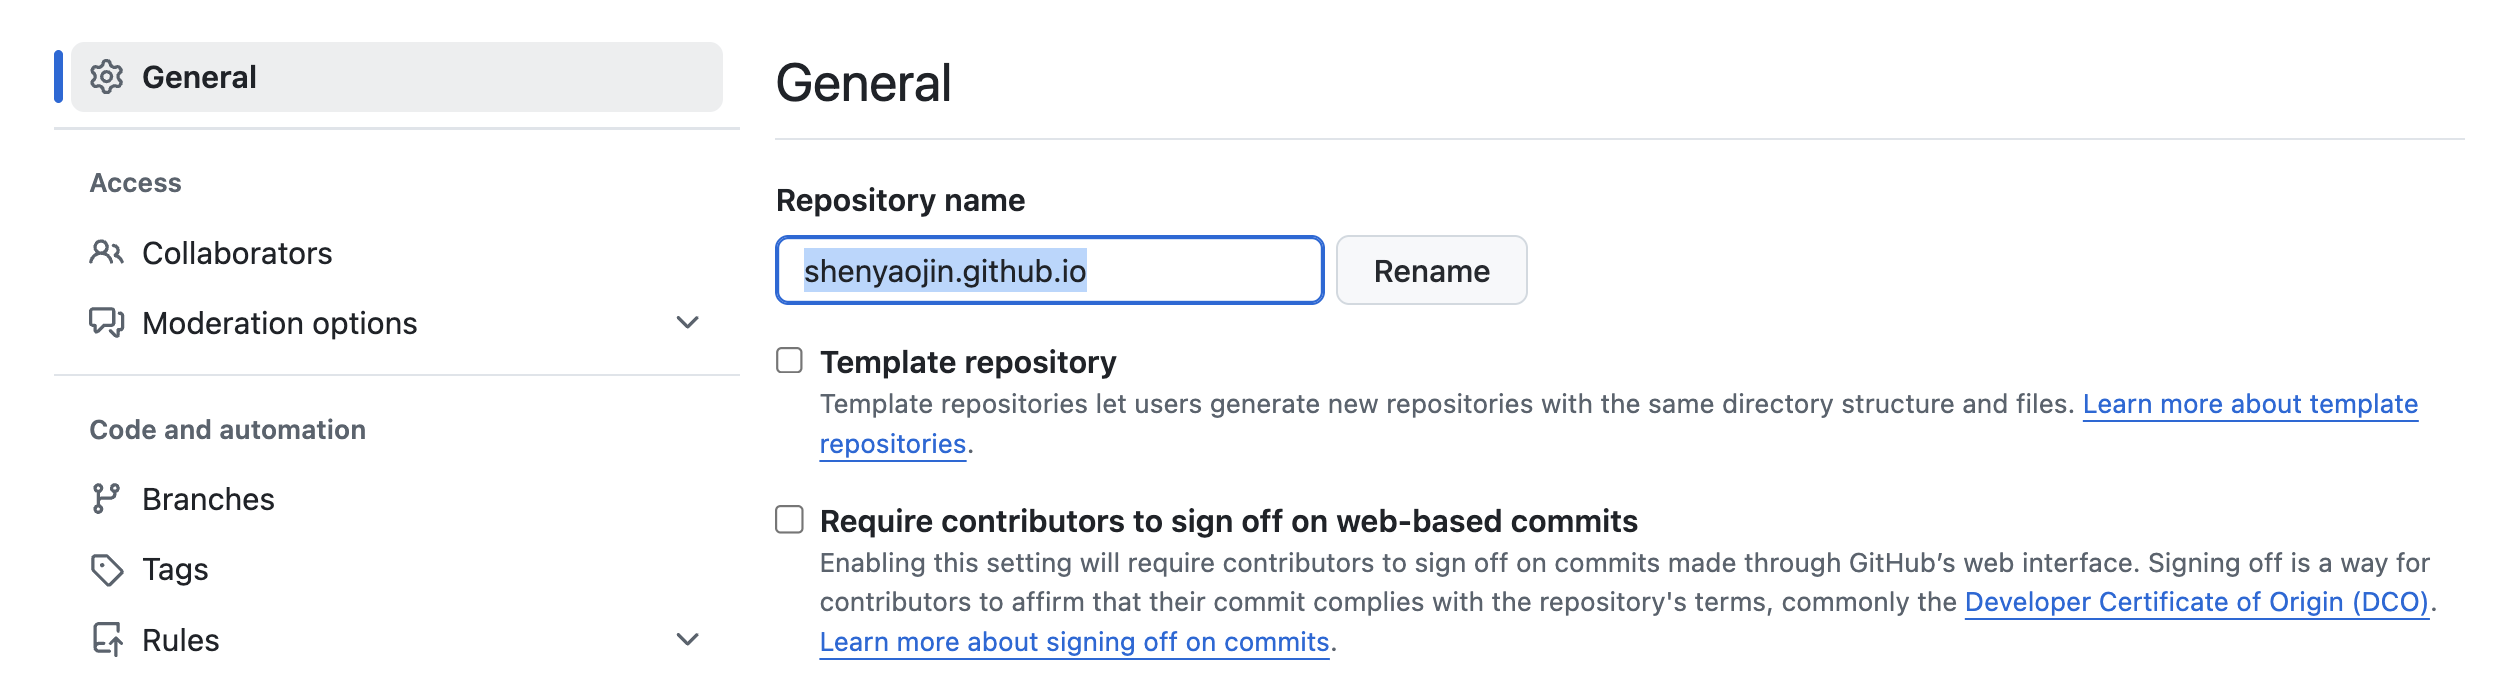
- Rename the Repository:
- After forking, navigate to your new repository (it will be under your GitHub username).
- Click on the “Settings” tab.
- In the “Repository name” field, change the name to
<your-username>.github.io(must be exactly your GitHub username, if you’reabc123, it should beabc123.github.io). - Scroll down and click the “Rename” button to save your changes.
- Customize Your Blog:
- You can now edit the content of your blog by modifying the files in the repository.
- Update
_config.ymlwith your site details (e.g., title, description, URL), the original file looks like this:title: shenyaojin.github.io <- Change this to your site title tagline: Shenyao's Github page <- Change this to your site tagline description: shenyaojin.github.io <- Change this to your site description url: http://shenyaojin.github.io <- Change this to your site URL baseurl: / <- Change this to your site baseurl paginate: 5 paginate_path: permalink: /:categories/:title/ markdown: kramdown author: name: Shenyao Jin <- Change this to your name url: http://shenyaojin.github.io <- Change this to your personal URL email: shenyaojin@mines.edu <- Change this to your email plugins: xxx <- Keep this as is, don't change it version: 1.2.0 google_analytics_id: xxx - Replace the content in
_posts/with your own blog posts. Each post should be a Markdown file with a specific naming convention (e.g.,YYYY-MM-DD-title.md). - Edit
about.mdand other pages to reflect your personal information.
- Commit and Push Changes:
- After making your changes, commit them and push to your GitHub repository:
 git add .
 git commit -m "Customize my blog"
 git push origin main
Or you can use the GitHub desktop application to commit and push changes if you’re not comfortable with the command line.
- After making your changes, commit them and push to your GitHub repository:
- Enable GitHub Pages:
- Go to the “Settings” tab of your repository.
- Scroll down to the “Pages” section in the left sidebar.
- Use the same settings as shown below to enable GitHub Pages:

- Access Your Blog:
- After a few minutes, your blog should be live at
https://<your-username>.github.io. - You can share this URL with others to showcase your blog!
- After a few minutes, your blog should be live at
Advanced techniques: editing locally and previewing before pushing to GitHub
If you want to edit your blog locally and preview it before pushing changes to GitHub, follow these additional steps:
- Clone Your Forked Repository:
- Open your terminal or command prompt.
- Clone your forked repository to your local machine:
git clone https://github.com/<your-username>/<your-repo-name>.git
cd <your-repo-name>
- Install Jekyll and Dependencies:
First, you should install Ruby 3.x; on MacOS, you can use Homebrew:
brew install rubyThen, install Bundler and Jekyll:
gem install bundler jekyllNext, install the required gems:
bundle install - Serve the Site Locally:
- You can now serve your site locally to preview changes:
bundle exec jekyll serve - Open your web browser and go to
http://localhost:4000to see your blog.
- You can now serve your site locally to preview changes:
- Make Changes and Preview:
- Edit the files in your local repository using your preferred text editor.
- After making changes, save the files and refresh your browser to see the updates.